How to Install Toshiba Printer Driver on Mac

What is a Printer Driver?
A printer driver (or print driver) refers to a piece of software that works as a translator between computers and printers.
Without a printer driver, your computer cannot send information to a printer in a format the printer understands. In order to print anything, you need to install the relevant printer drivers on your computer.
Why Didn’t My Computer Come Installed with Toshiba Printer Drivers?
Different printer brands require different drivers, and each of those drivers can vary even more based on individual printer models.
Your computer’s manufacturer has no way of knowing which brand you plan on using, let alone the model.
Installing every single printer driver would take up more storage space than what’s needed.
This means it’s up to you to install the correct printer driver.
While that may sound like an intimidating task, the experts at Mid Ohio Strategic Technologies are here to help you through the process of installing Toshiba printer drivers on your Mac device.
Installing Toshiba Printer Drivers for Mac
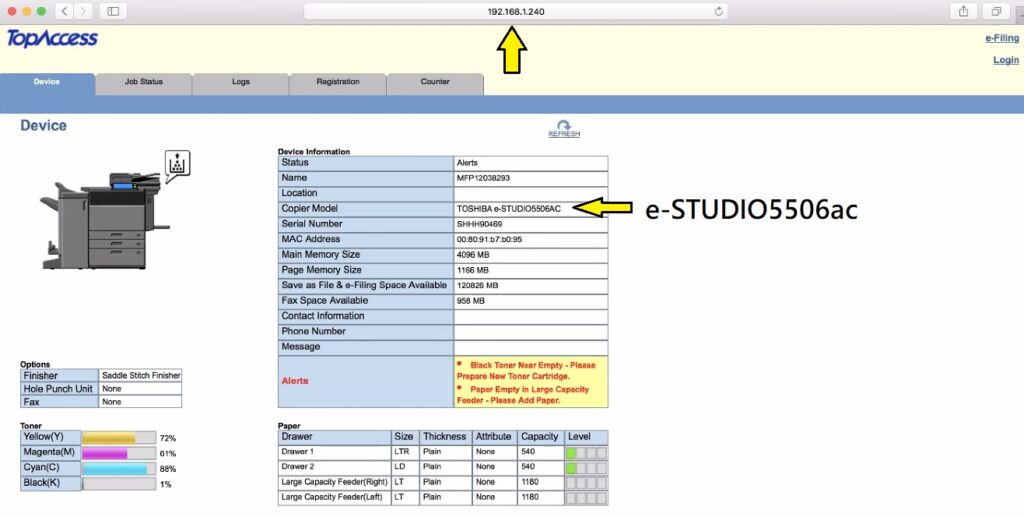
1. Find the Toshiba Printer’s IP Address and Model Number
You will need to know the IP address of the Toshiba printer you’re setting up.
You can type its IP address into the URL field of a web browser and hit enter to pull up the Top Access page of the printer.
On that page, you will see the Printer Model field, which you need to know in order to download the correct driver.
In the below example image, the IP address is 192.168.1.240 and the model (listed as Copier Model) is a 5506.
2. Go to Our Download Drivers Page
Go to bizmachines.com to download the driver. Hover over the navigation menu’s Resources tab, and then choose Download Drivers from the dropdown menu.
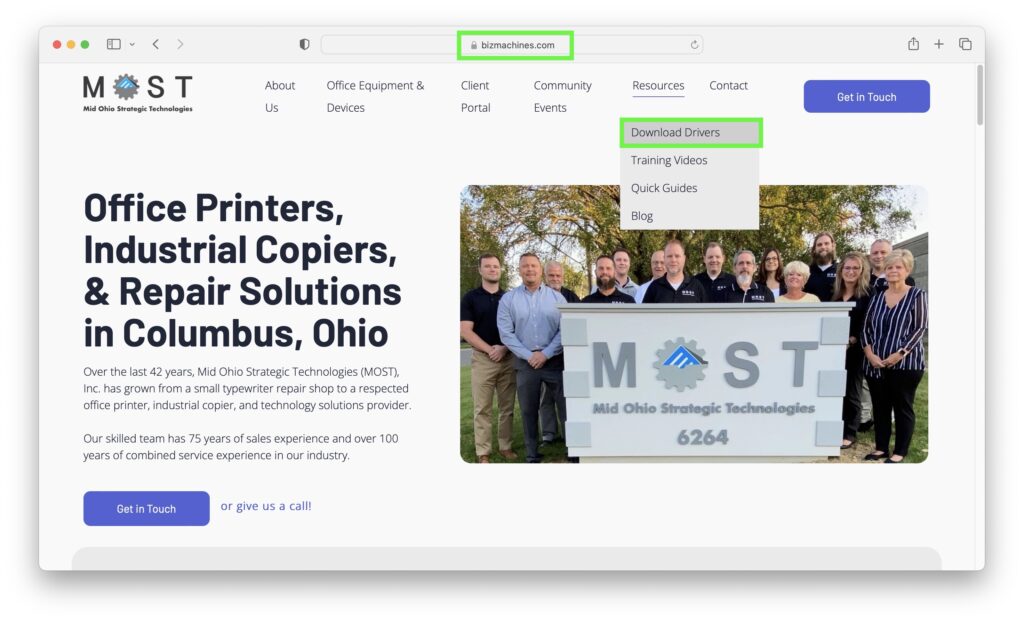
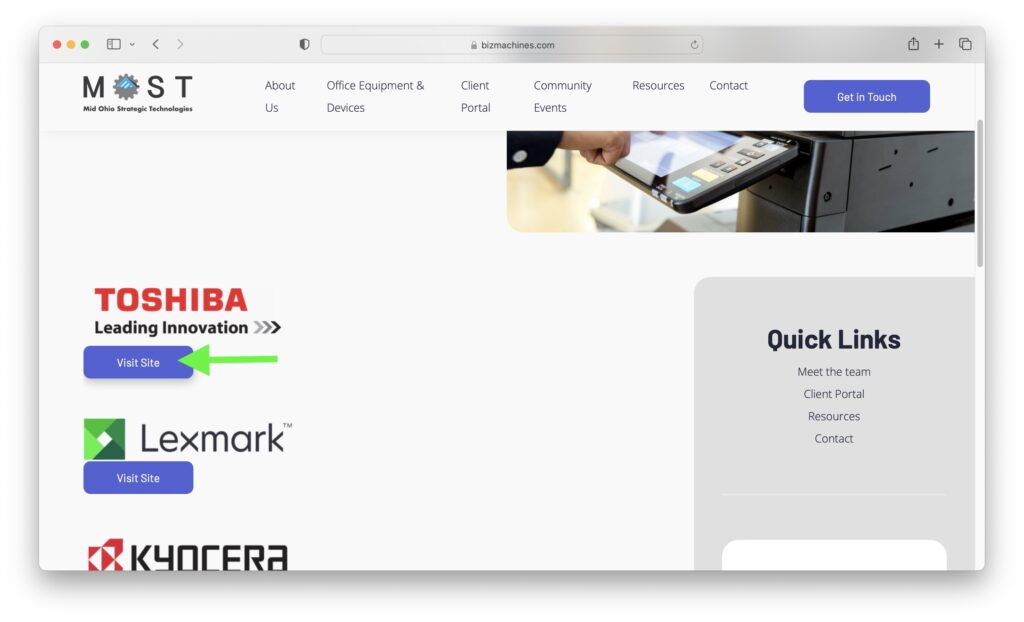
On the Download Drivers page, you will see a list of brands we service.
Click the purple Visit Site button below the Toshiba logo. This will take you to the official Toshiba support website.
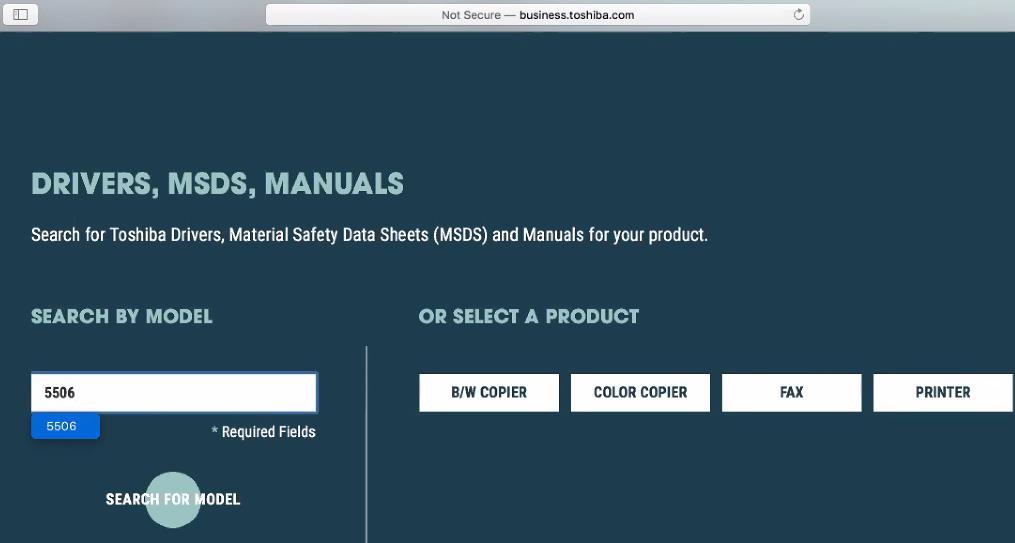
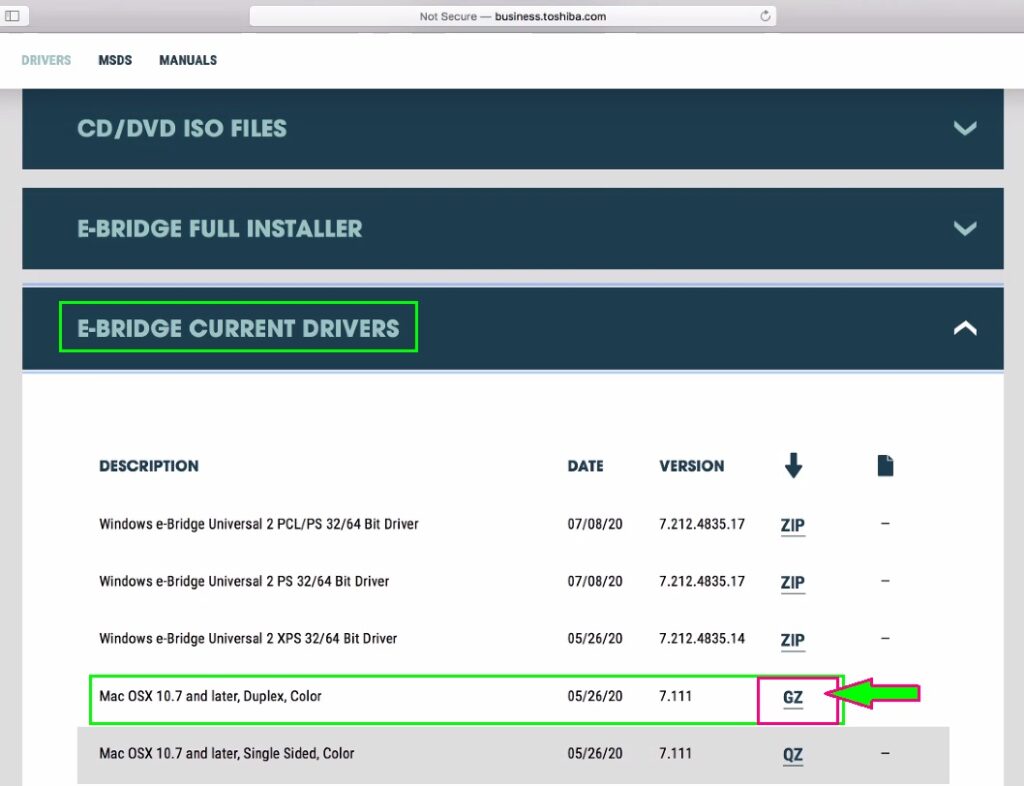
3. Find the Correct Toshiba Printer Drivers
On the Toshiba support website, type the 4-digit model number in the box that has the words MODEL NUMBER in it. Then click the Search for Model button, located beneath the text box.
4. Start the Toshiba Printer Driver Download
After entering the model number into the site, you will see a list of items. Click the category named E-BRIDGE CURRENT DRIVERS. It will expand to reveal a hidden dropdown list of drivers.
Click on the letters GZ on the first Mac OSX driver to download the driver to your MacBook.
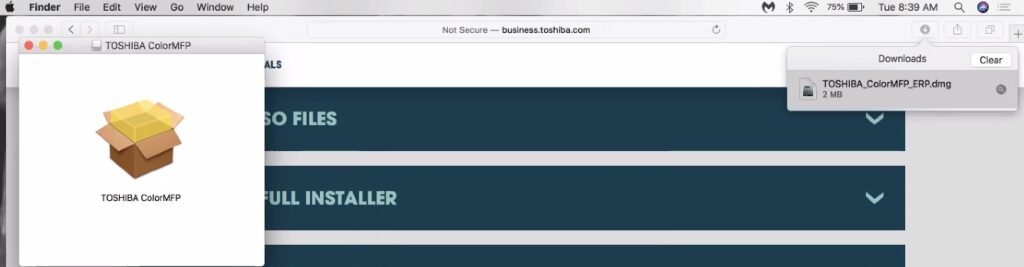
5. Download and Install Toshiba Print Drivers on Mac
Now we will install the driver onto your MacBook. It should be in your Downloads folder.
To begin the installation process, you need to run the file. You can do this by simply clicking on the file.
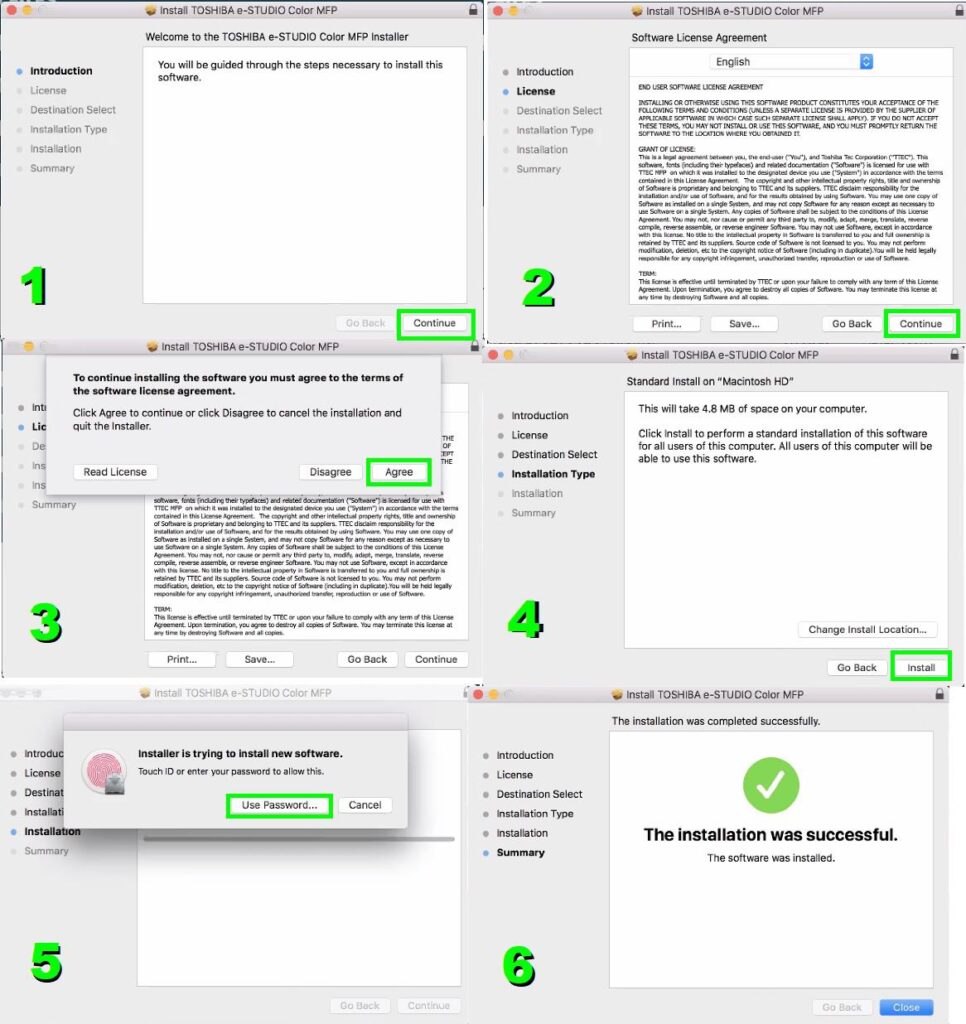
Here are the main steps for the installation of the driver as they appear in the install window.
Some of these steps may vary in appearance depending on which Mac Operating System (OS) version you are using; however, the steps are generally the same: Keep clicking Continue and Agree to the terms of use. Then you should see the word Install in the place of the Continue button.
Before installation begins, a window prompting you to enter your password for authorization will appear. This password is the same one you use to log in to your computer. Entering the password initiates the installation process.
When the installation is complete, the install window will display a success message.
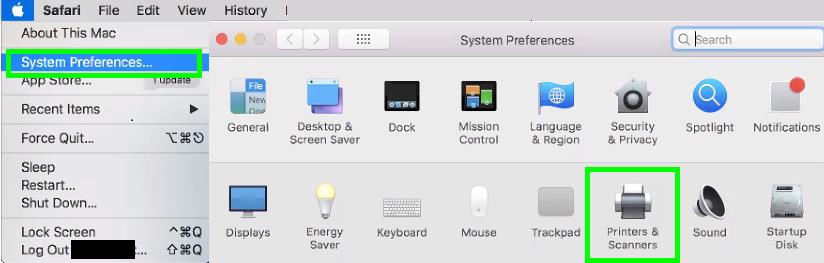
6. Add the Printer to Your Mac
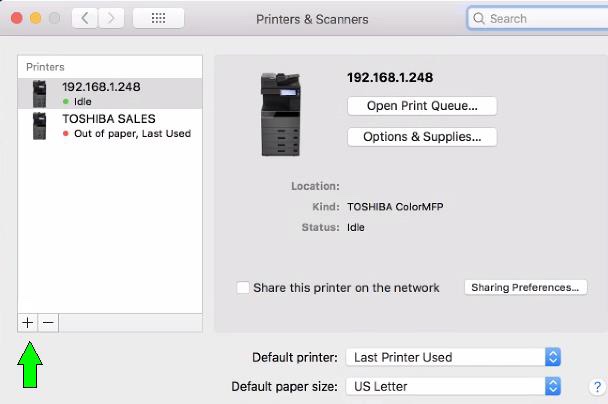
With Macs, there are still a few steps more to go. Go to System Preferences and click on Printers & Scanners.
With Printers & Scanners open, click the + button in the lower left to add a printer.
On the next screen, click IP up top and then type in the IP address of the Toshiba device. It should detect it on the network, then detect the driver you just installed, which will populate under the last field, Use. In the example image below, the name TOSHIBA ColorMFP populated in the Use field after we entered the IP address.
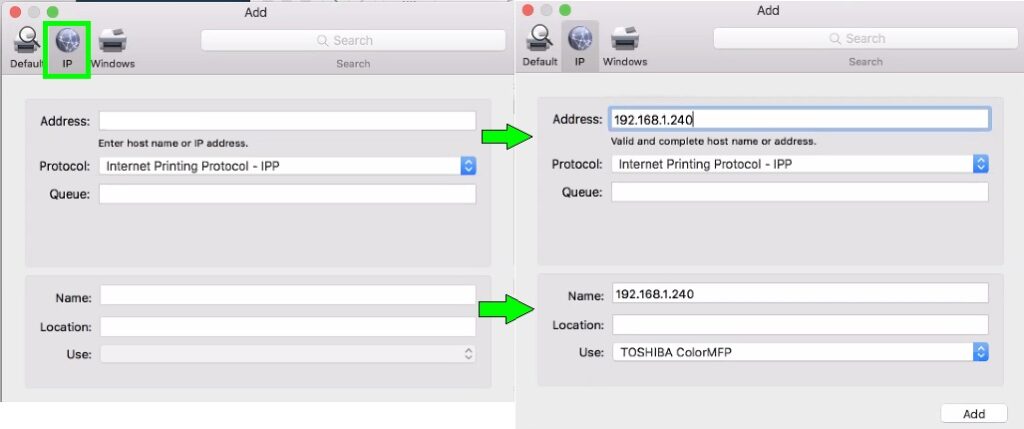
You can name your printer here, too. It automatically puts the IP address in the field, but you can change it.
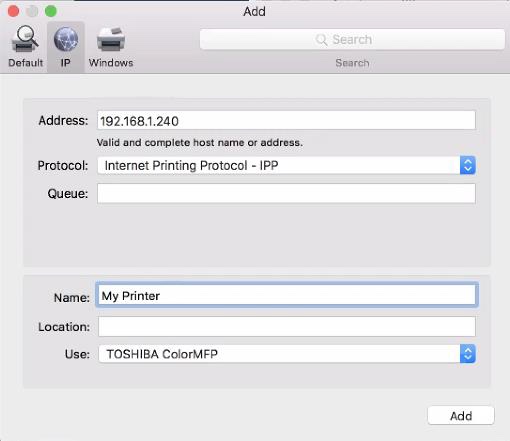
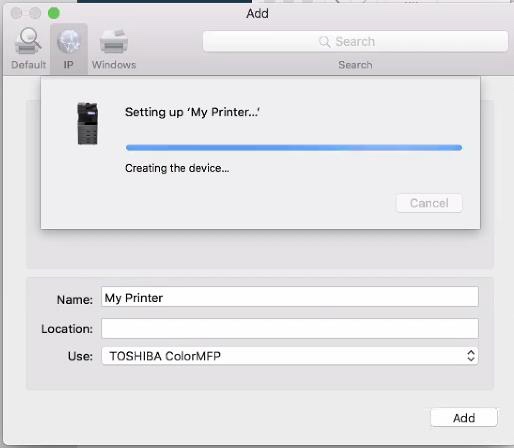
Then hit Add to set up the Toshiba print driver for use.
7. Add Presets
You can use your Toshiba printer now, but there is one more part that most users also set up: presets.
There are all kinds of settings that can be saved into a preset, including finishing settings like staples or hole punches.
If your business uses department codes, you will have to create presets and embed the print codes or the printer will not work. Both color and black-and-white presets are usually created.
To create a new preset, open a blank document in Pages or Word, type something in the document, then go to File and click Print in the dropdown menu. This will pull up the Printing menu.
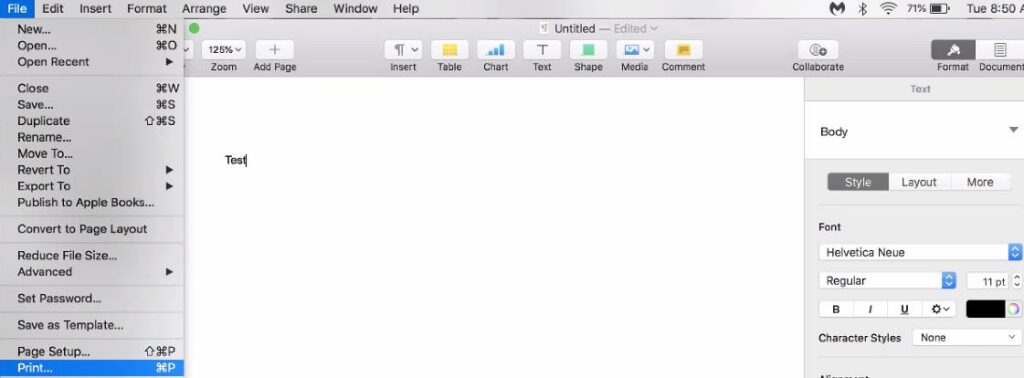
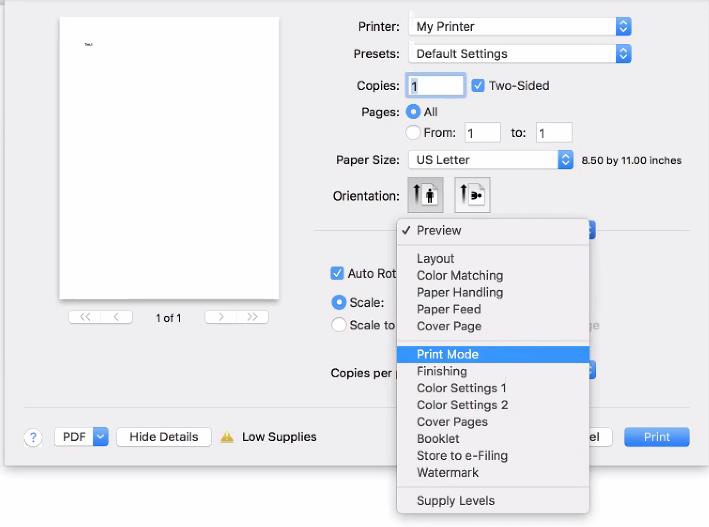
The dropdown menu we’re looking for should have Print Mode and Color Settings options.
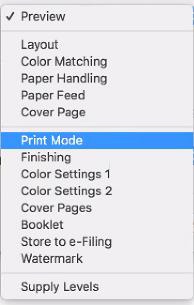
Print Mode is where you would put your department code. Color Settings are where you would set Mono (black and white) or Auto (color).
Sometimes you will not see the dropdown menu we’re looking for on the Printing menu, in which case you can hit Open in Preview.
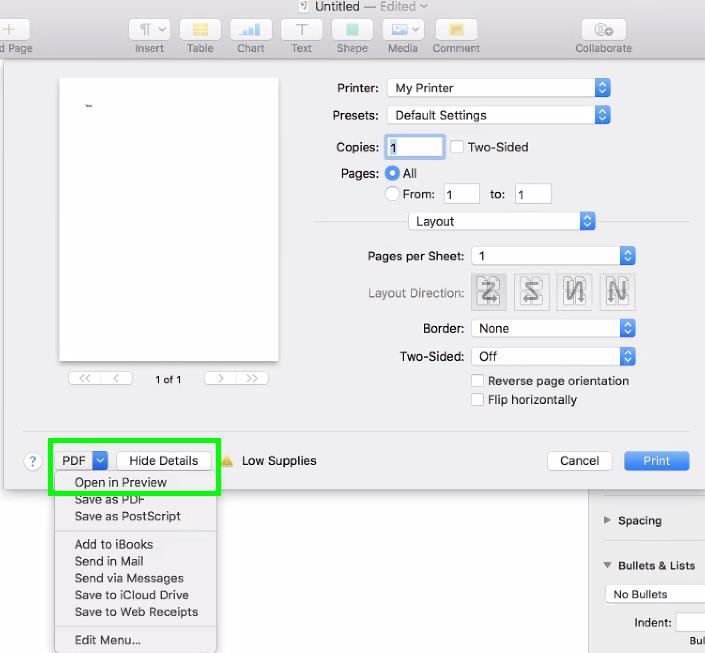
If you had to hit Open in Preview because the menu with Print Mode and Color Settings was not there, then the doc will open again and you will have to go to File and select Print from the dropdown menu again.
Then you should see a menu like this:
Once you make the changes you want, then you can use the Save Current Settings as Preset option and name the preset.

If you want to make another preset, simply make the changes you want and save that one under a different name.
Be sure to test print presets to make sure they work, which you can do prior to saving them.