Toshiba Copier Department Code Setup
How to Add Department Codes to Toshiba Copiers
Department codes are an invaluable tool for tracking usage, allocating costs, and improving overall efficiency.
By implementing department codes on your Toshiba copier, you can gain better control over your document management processes and enhance accountability within your company.
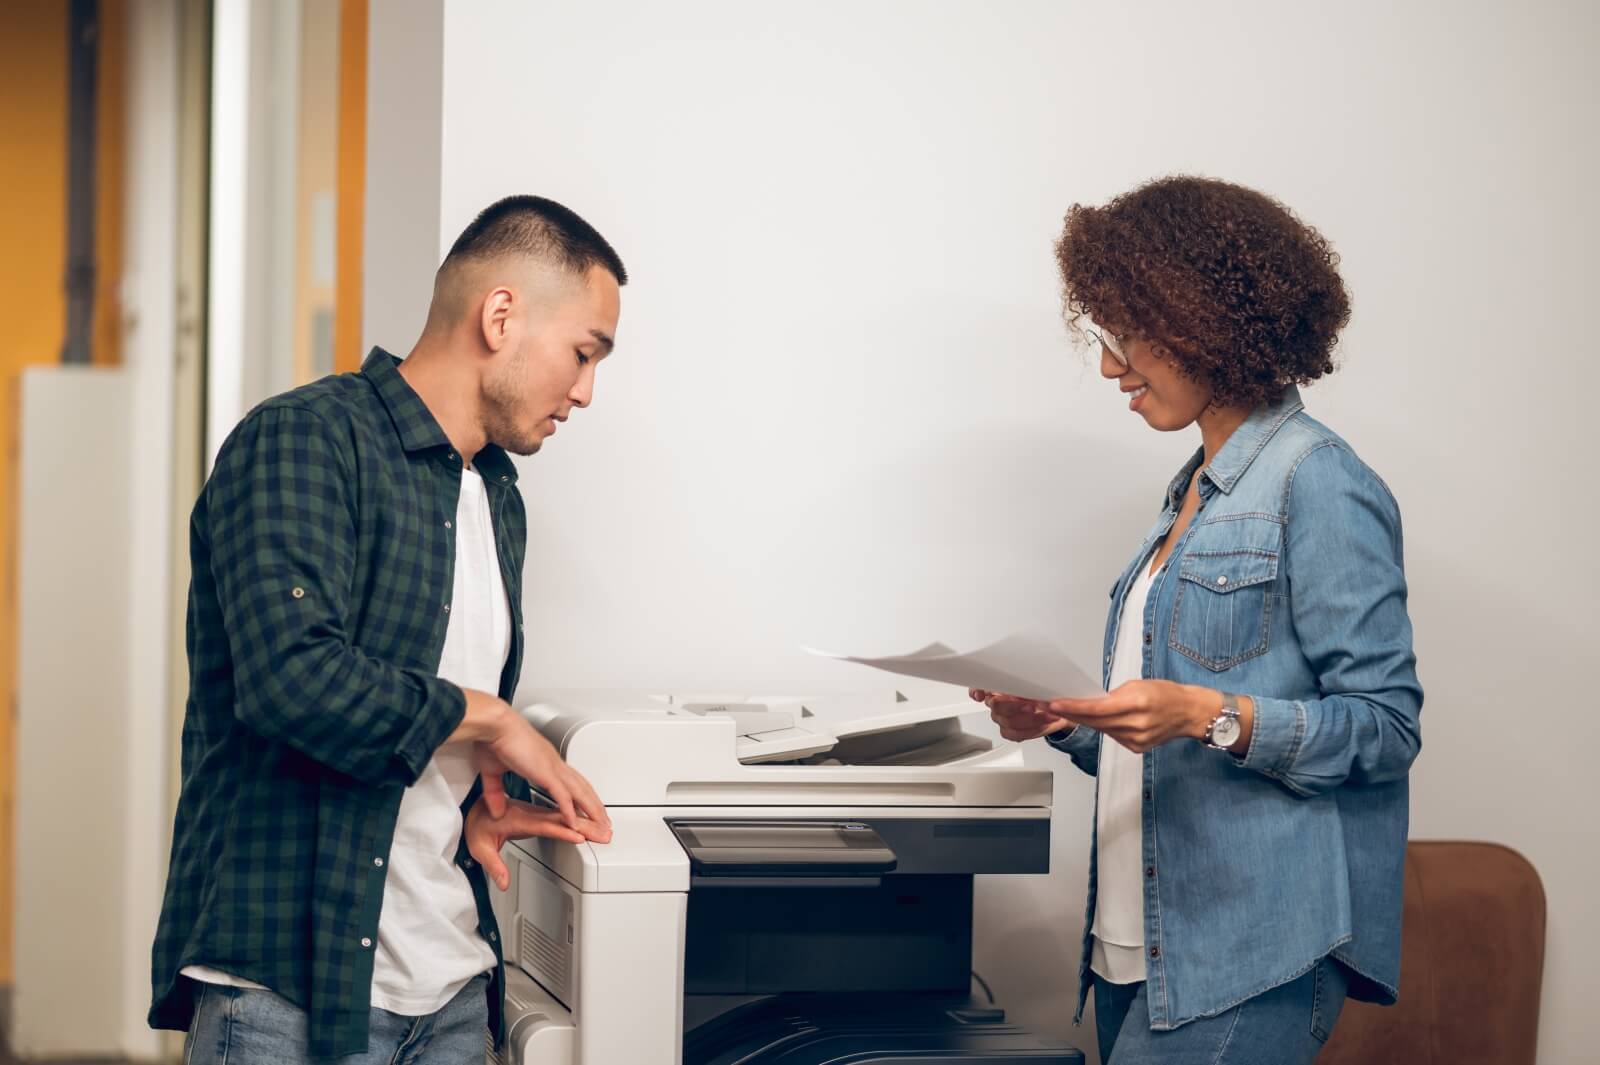
In this simple step-by-step guide, we’ll walk you through the process of setting up department codes for your office’s new Toshiba copier, making it easy for you to get started and optimize your office operations.
1. Log In to the Copier
The first thing you need to do is log in to the Toshiba copier via a web browser from a desktop or laptop computer that is on the same network as the copier.
You will need to know the IP address of the copier to do this.
If you type the IP address into the URL web address field and hit enter, it will resolve to the TopAccess web graphical user interface.
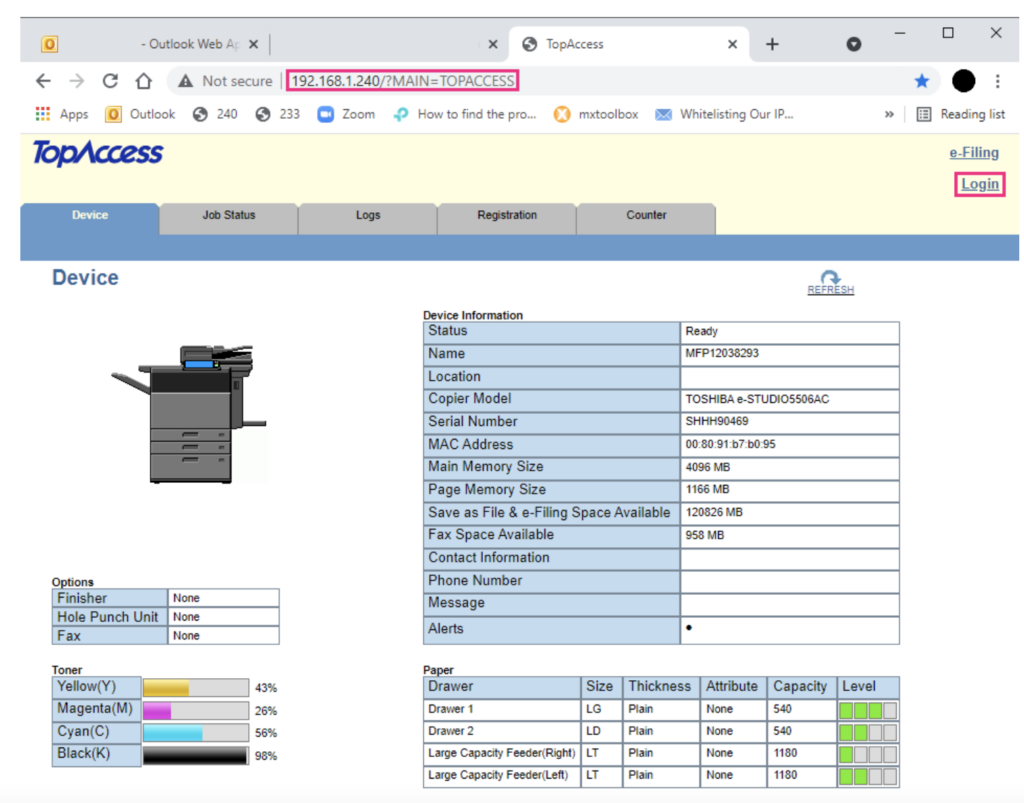
This page will show you the make and model of your copier as well as the current toner levels. You will need to log in to get to the department code settings.
Click Login using the default username (admin) and the default password (123456).

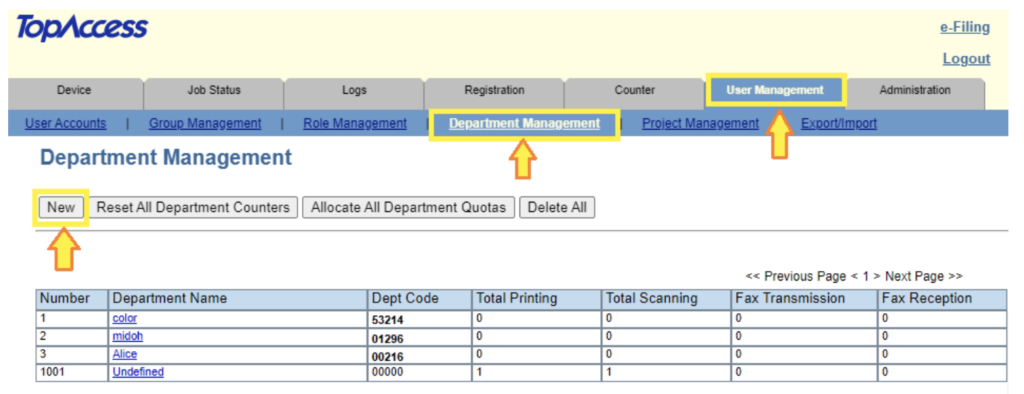
2. Create Codes in Department Management Settings
Once you’re logged in, you need to create the department codes you want. Turning them on will be a later step so don’t worry about them taking effect yet as this will not change anything until we turn them on.
Go to User Management -> Department Management (this will appear in the blue bar) and from there, hit New to create a department code. Initially, the only one you will see is 1001 Undefined.
3. Set Quotas for Department Codes
When you create the department code, you have the option to set quotas per department code. For most places, the only thing people are concerned about is color prints.
These can be tracked by logging into TopAccess every week or month to track usage.
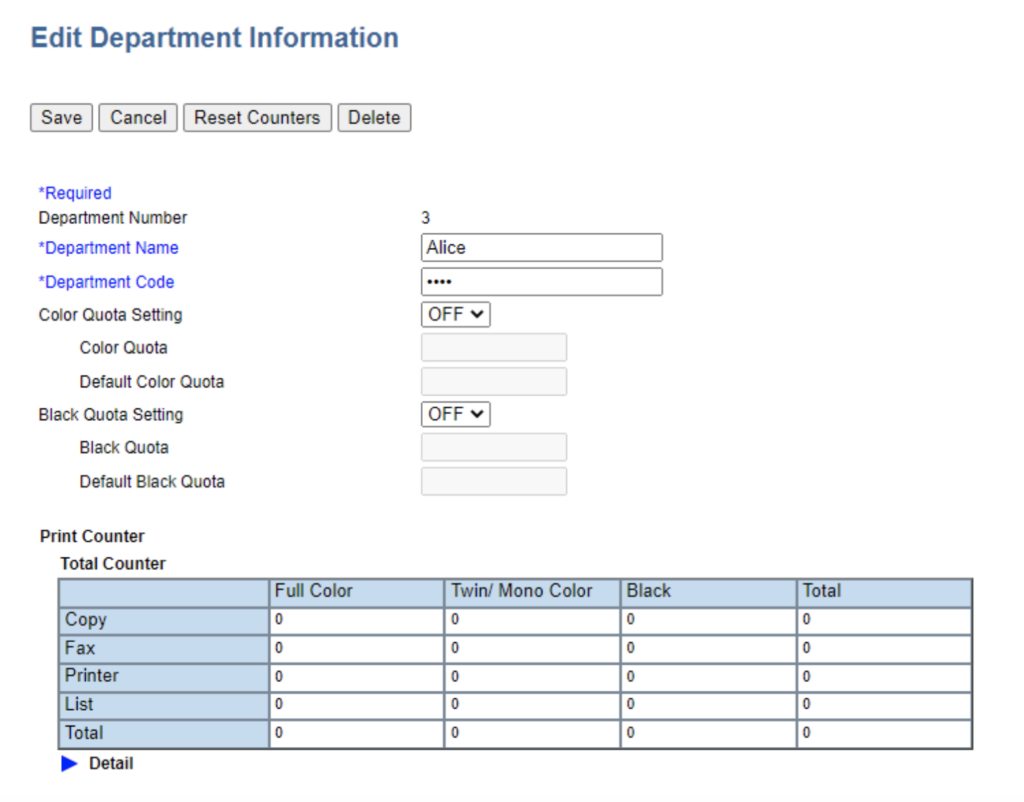
If you want these codes to only be required for color prints, there is a No Limit Black setting that we can turn on once the codes are activated. (This will be covered later in this blog.)
Create all the codes you want. You can always go back and make more if needed or delete ones no longer needed later. Just be sure to hit Save after each new code.
4. Enable Department Codes
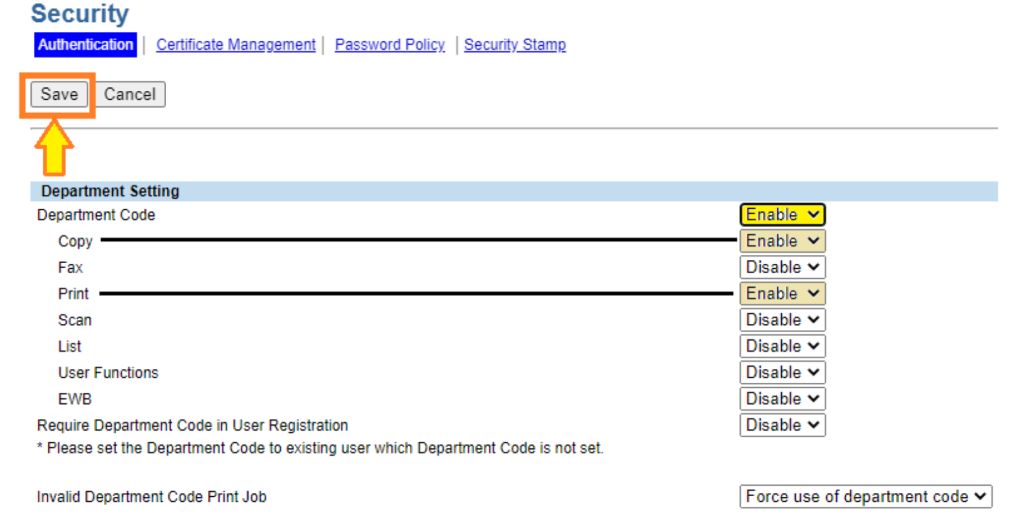
Now that the department codes are created, they are of no use until we turn them on. Go to Administration -> Security -> Authentication and the first thing you will see is Department Settings, where they are disabled by default.
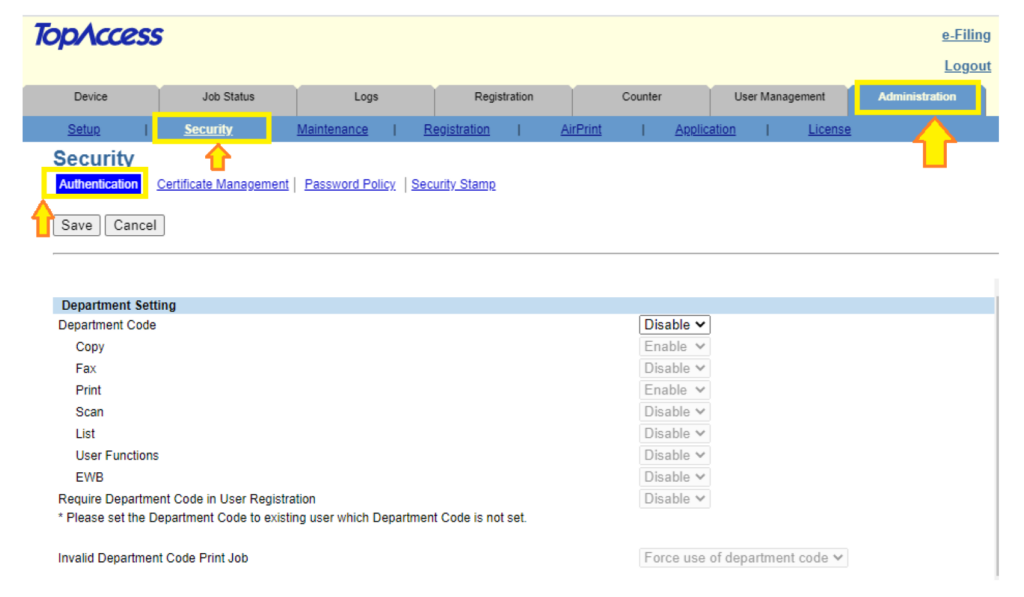
When you enable the department codes, most people only enable it for Copy and Print as those are the only 2 functions in the list that put toner to paper. Enable all the functions you want.
Don’t forget to hit Save.
When users hit print, the copier will prompt them for a department code if it’s the correct print driver and on a Microsoft Windows operating system.
Macintosh computers need to have presets created with the code embedded because they will not automatically prompt the user but instead fail to print without explanation to the user as to why it didn’t work.
5. Embed Department Codes on Toshiba Universal Driver
The last thing to be aware of is that you can embed your department codes on the Toshiba Universal Driver by going to Printer Preferences.
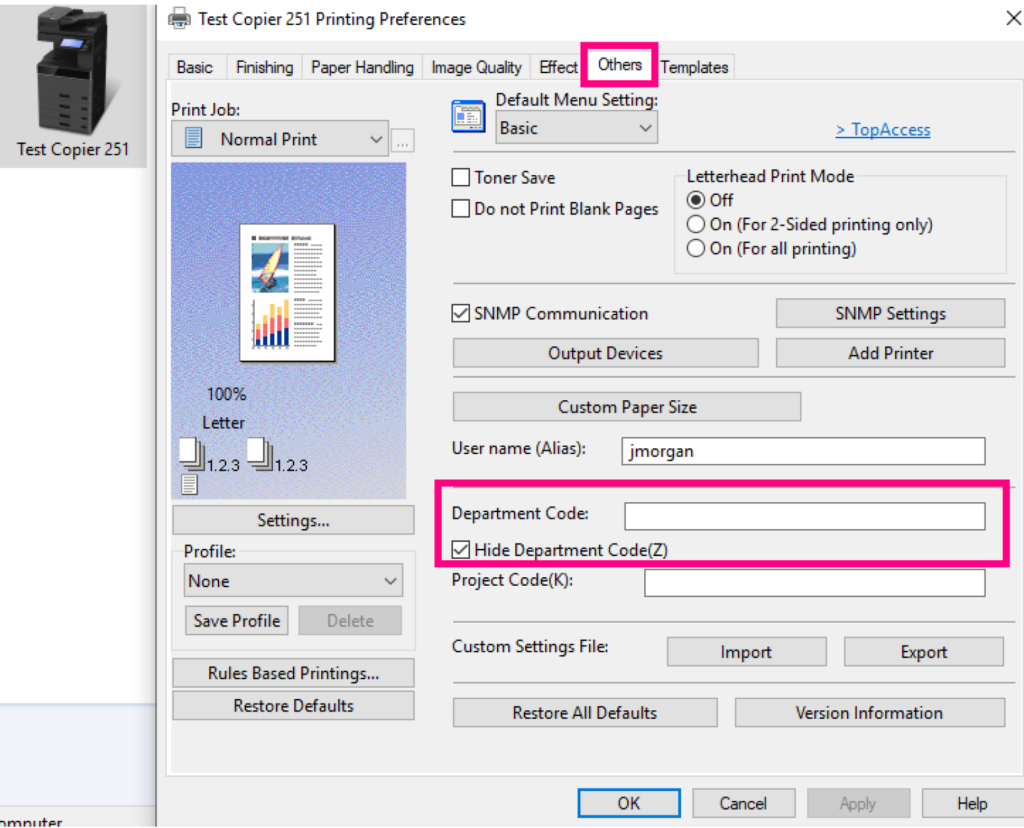
Once you find your Printer Preferences, there’s a tab at the top called Others. Click that and you will see where you can put your code in. Toggle the Hide Department Code (Z) to be able to see the code you type. Make sure to click Apply or OK so it takes effect.
Now when the user prints, the device will pull the codes from here Toshiba Universal Driver and they will not be prompted for it.
Optional: Setting Up Department Codes for Color Prints and Copies
If you only want codes for color prints and copies but not for black and white, then you need to go to the copier touch panel to turn on No Limit Black.
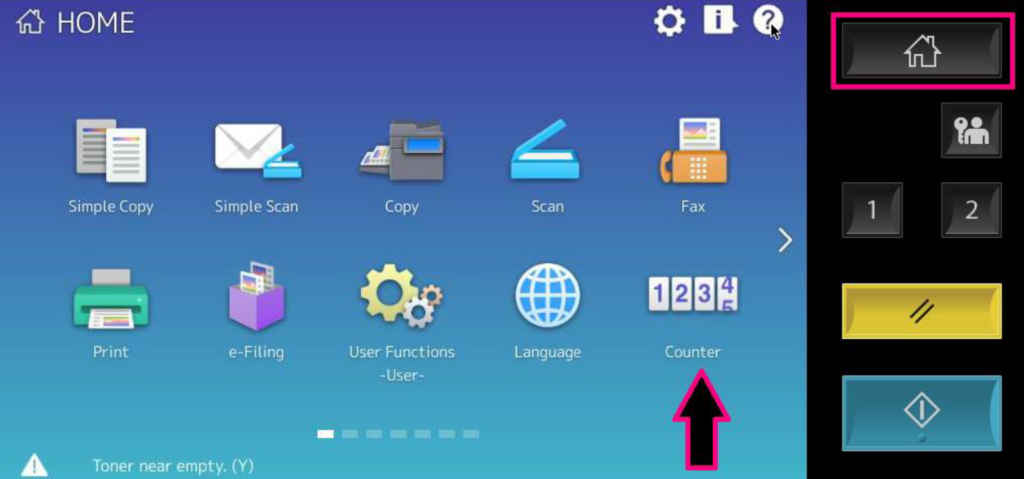
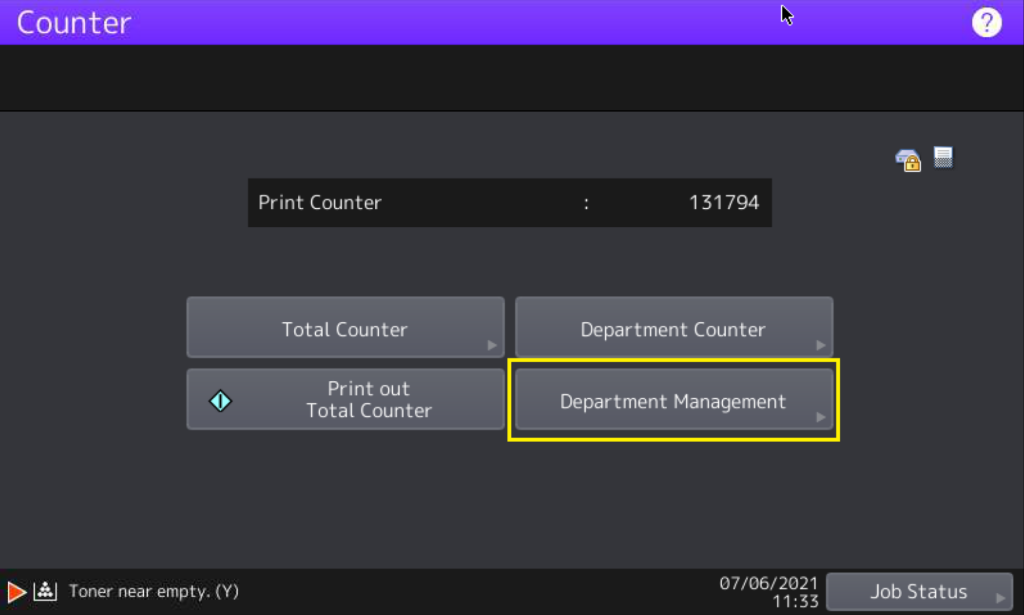
On the home screen, you want to hit Counter.
If the copier is on set to the copy screen, just hit the physical Home button, then hit Counter.
Next, you hit Department Management then you’ll be prompted for the admin password, which is the same one from earlier: 123456.
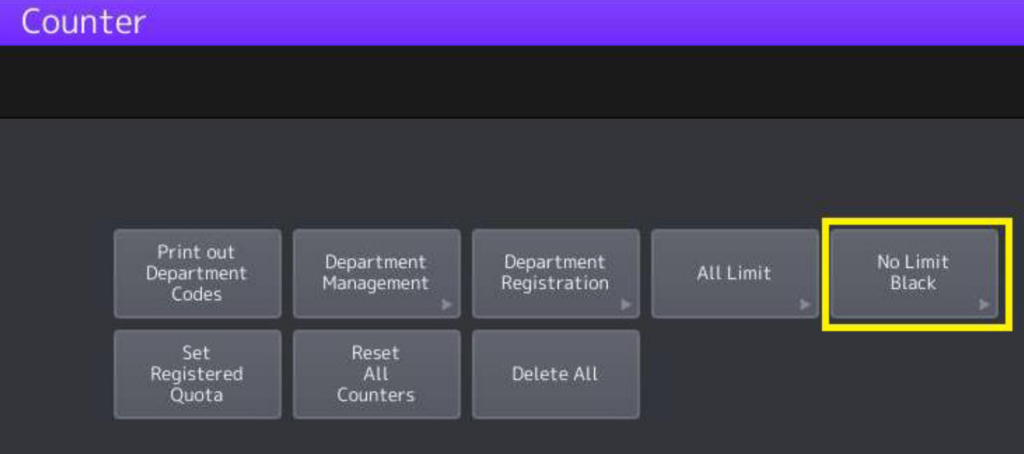
Then you’ll see more options and No Limit Black will be on the far right of the screen. If it’s grayed out then that means the department codes were never turned on.
Hit No Limit Black, and on the next screen select Enable. You can back out or cancel out from there.
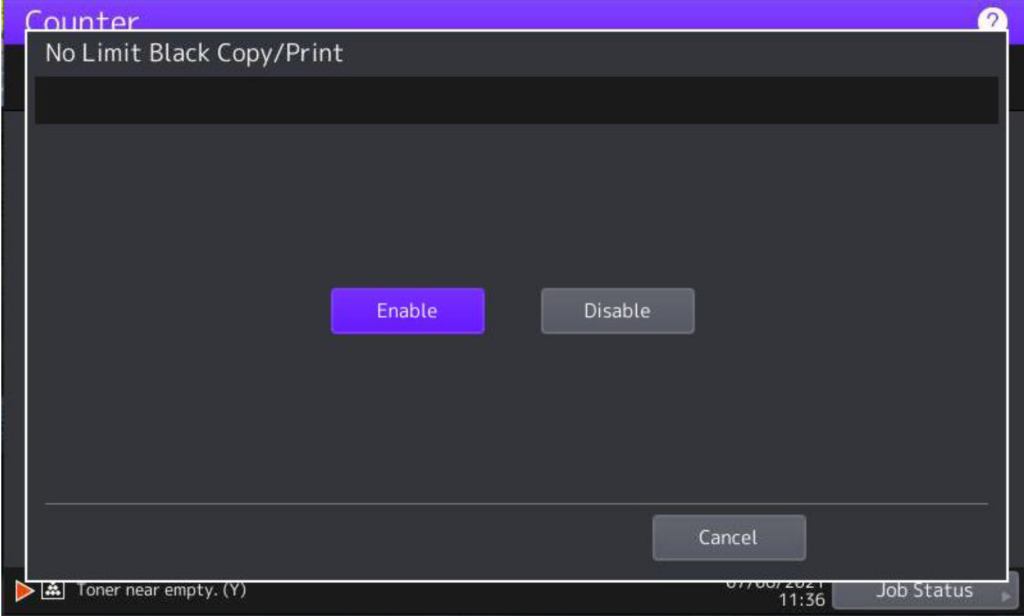
There will now be no restrictions on black and white copies or print jobs.
Need Additional Support? Contact MOST to Get the Best Copier Services
If you’ve made it all the way to the end of this blog, this means one of two things: You have either completed the series of instructions successfully or still need help setting up department codes.
If you need additional support or services for setting up your Toshiba copier’s department codes, don’t hesitate to contact Mid Ohio Strategic Technologies for more information.